What's in this post...
![]()
Last Updated on June 19, 2018 by Graham Walsh
To use Pexip Infinity with things like Office 365 Skype for Business and not to have any annoying untrusted SSL errors (and also best practise), you need to apply a public certificate to at least the management node. This guide will step you through generating the CSR on the Pexip management node and then using https://www.ssl.com/free to get a free 90 day trial single name certificate. Perfect for a lab or PoC.
Step 1 – Create Certificate Signing Request
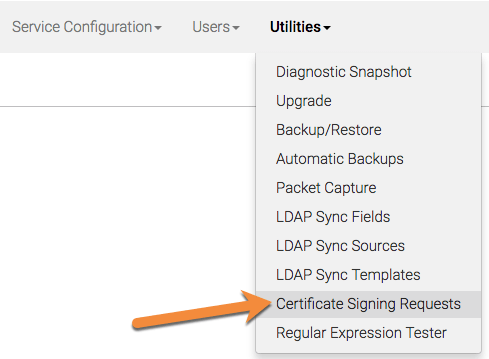
Log into the Pexip management node and navigate to Certificate Signing Requests and click on Add Certificate signing request.

Now select the Subject name from the dropdown or you can enter your own custom subject name. Also add server to the Subject Alternate Name (SAN) to the right hand side box.

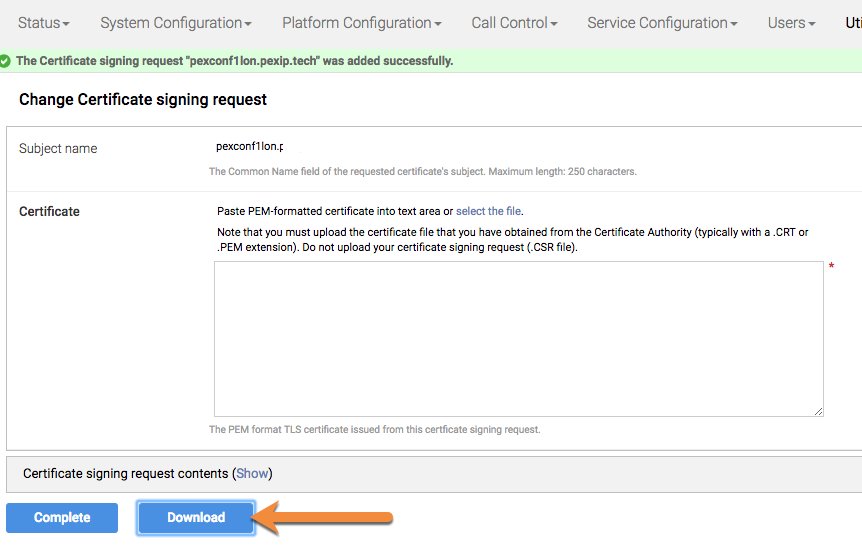
Once you have completed that, then download the CSR file onto your device and open it in a text editor.
Step 2 – Submit CSR
Now head over to https://www.ssl.com/free and create an account. Once created head back to the free URL.
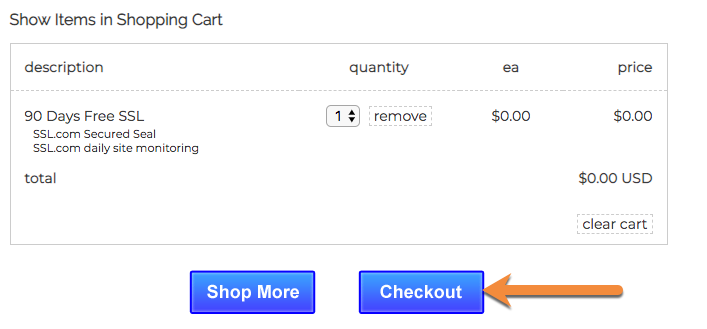
Click on Try now and then Add to Cart and Checkout.


Once you have completed that, you will get two emails confirming your “free” order. Now click on the top bar Click here to finish processing your ssl.com certificates.

Now select submit CSR and paste in the file that you downloaded off the management node and opened in your text editor. For the Server Software you can leave that to Other.


Then you just need to enter your contact details and select Next

Now you need to select how you are going to validate that you own the domain and certificate. Normally you can do this via email, but I have selected CNAME as I have access to my DNS server to add an entry.

Once you have been validated (can be a few minutes or a few hours) you will get an email with the certificates or you can get them from the webpage as per below. You will want your certificate in Ngnix format and you’ll also want the CA bundle. Download both of these.

Step 3 – Uploading the Certificates
Now that we have the certificates, log back into the Pexip management node and then head back to Utilities > Certificate Signing Request. Open the certificate you downloaded in a text editor and paste it into the box and select complete.

Then on the next screen select the node that you want to apply this to and press save.

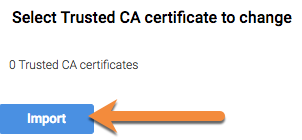
Now navigate to Platform Configuration > Trusted CA Certificates and select Import. Then choose the Bundle file you downloaded and then click Import.


You will now have a happy platform with a 90 day public SSL certificate. If you browse to the FQDN of the conference node, you will not get any warnings now.